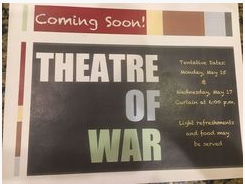
Everytime we created a new script, we presented it with blocking to the whole class. The first few times we got up in the front of the class––I was pretty nervous. I was scared of messing up my lines, not having a script that met the set standards, and group members forgetting the blocking. Each time we presented my worries went away and slowly I started trusting my team and more importantly myself. I started gaining more confidence and losing the sense of nervousness I would get in the previous times that I had presented. I feel much more confident after the experience that I gained with presenting throughout this project, the skills and tricks I learned when it comes to presenting are surely something that I can take with me into the professional world. All this given, I believe that the most growth I had throughout the course of this project within the five school wide learning outcomes was in Oral Communication. I became more confident, started trusting myself and my group, and learned how to handle last minute situations when they’re thrown at you. Here are some tips to ensure success when it comes to presenting!: 1. Don’t stress about the mess Don’t stress yourself out by thinking of everything that could go wrong. Keep yourself calm and assure yourself that it’ll all be okay. Think about everything that could go right and about all the time and effort you put into making sure it’ll go perfectly. 2. Fake it till you make it Faking your way to success is the way to go. By imitating confidence and competence, your behavior adapts and eventually you’ll adopt those qualities. 3. Practice makes perfect No one was born perfect. Perfection requires repetition and practicing over and over again until you get it right. It helps you work out all the kinks and make sure everyone is on the same page and knows what to say. By following these tips that I learned during Theater of War, you can lead yourself to a less stressful and more successful presentation! Good luck:)
0 Comments
In Design and Computer Science, we were given the task of teaching the whole class our topic, Error Detection and then making a display explaining it for a local Makers Faire. Error detection is the detection of errors in transmitted data. The receiving computer needs to check that the data coming into it has not been corrupted by any electrical interference. The recognition of corrupted data is called error detection while the reconstruction of corrupted data is called error correction. The bits (instructions computers are given using 0’s and 1’s) are put into imaginary rows and columns, and by adding parity bits (a bit added to the end of a string of binary code to ensure that the total number of bits is either even or odd) to each row and column, we can detect if an error has occurred and where. Here is a visual to better explain what I’m talking about:  To make this concept simpler and an engaging teaching lesson, my group and I decided to do a magic trick with the class. We cut out 36 identical 2-sided hearts, one side was red and the other side was white
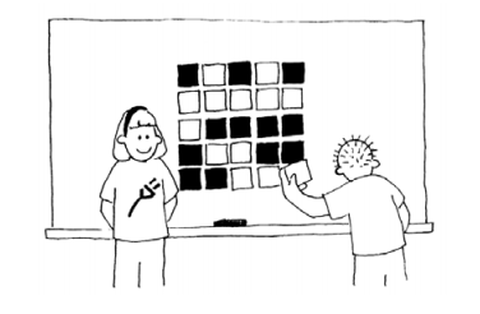 2. Then, we added an extra row and column of the hearts (making the red side of the hearts either even in every column and row) telling the audience that we were “making it a little harder” 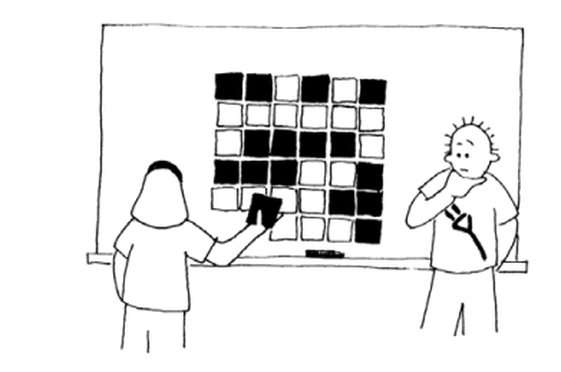 3. Then we asked that same student to flip a card over while the “magician” was turned around and the “magician” would try to figure out which card was the one the student flipped over. Since one of the hearts was going to be flipped over, the row and column containing an odd amount of red hearts would be the heart that was flipped over because all the other rows and columns had an even amount of red hearts.  After teaching Error Detection, my group and I created a display to teach Error Detection at a local Makers Faire. The finished product turned out really well. 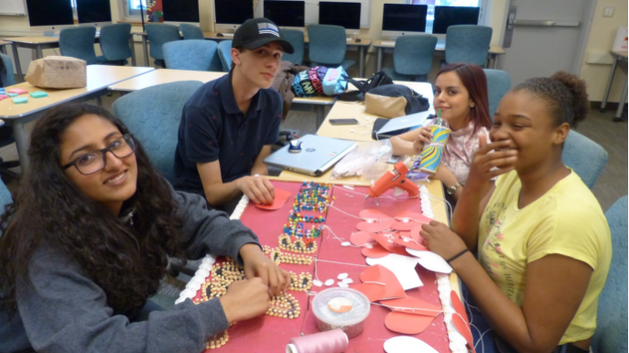 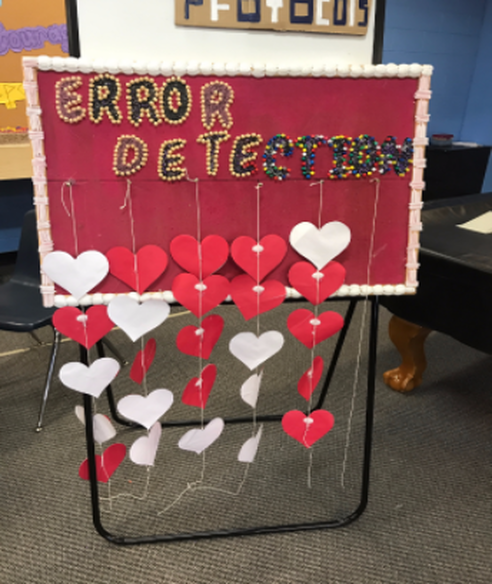 If I was to do this project again I wish that we could have more time because it was rushed and I know that my group and I could have done much more had we had more time. We were going to do string art inside of all the letters spelling out error detection but we did not have enough time. Also it was supposed to be a 6x6 grid of the hearts but we ran out of hot glue sticks on the very last day and if we had another day we could have gotten more and finished our display. It turned out very well though and I’m happy with the finished product!
Joke: Q: What do you call this: “Pieces of nine, pieces of nine”? A: A parroty error. In Digital Media, we started this semester off learning about binary numbers. Computers are built from collections of switches which can be either on (1) or off (0), also known as binary numbers. On and off or 0 and 1, represent different letters of the alphabet. Each letter is assigned a number and the way that we were taught it, using little cards with different amounts of dots 16, 8, 4, 2, and 1 IN ORDER we create the number that the letter was assigned. We flip over the little cards that we don’t need and leave the ones that are necessary to making the number facing up. The little cards that are facing down are off (0) and the ones facing up are on (1). For example: 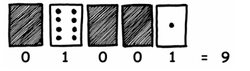 The number 9 represents the letter “I” on the UTF-5 alphabet  This is the rest of the alphabet When I first heard about binary numbers it sounded like it was a complicated confusing thing that I wouldn’t understand. Once Ms. Gottfried explained what they were and how to write using binary code everything started clicking. We used beads to make pins of our initials in binary code using purple for on and silver for off. It made so much more sense after doing an activity with it and was a fun way to learn about binary numbers. Also, using the little cards really helped because it was a great way to visualize the arrangement of the 0s and the 1s. Prior to this lesson on binary numbers, I did not know about binary numbers and I only had a little background knowledge on coding. Now I am comfortable using binary code to write words and I don’t need the little cards from before to help me. For our current project we are 3D printing jewelry with hidden words written in binary code using different symbols for on/off. I am excited to see how that goes! In Design and Computer Science, we were put into groups and told to use Adobe Premiere Pro to create an "Epic Movie". We were given a list of camera shots and techniques that we were supposed to include in our film and were given 2 weeks to film and edit our video. Our group had several technical difficulties, but we collaborated somewhat well together. As individuals we got along well, but we had the problem of group members wandering off and all of us getting off task at some point while working together. For next time I have learned that assigning each other roles as we do in other classes such as World Studies is important. Although this might be annoying, boring, time consuming, and seems to be "unnecessary" at times, but in this situation it would've worked well. If each group member is assigned a role then we all know what we have to do during that class period or for that project. It gives everyone something to do and ensures that everyone in the group contributes equally. It is also useful because it holds everyone accountable for their own work. If they do not do their work then we can hold them accountable for that and discuss what to do in that situation. Which is where a group contract comes in. Now I finally see why group contracts are actually useful. They set guidelines and agreements in place that a group agrees to before a project. It places responsibility on everyone for doing their own work and sets consequences in place if their work is not done. Also, when working in a group it is important to have a goal. This creates a motive and we get an idea of what we need to get done by the end of the day. 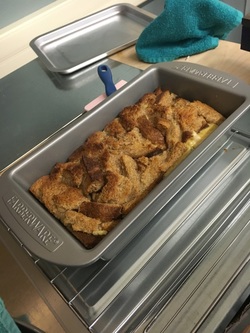 Bread pudding dates back to the 11th century when it was made by frugal cooks who didn’t want their bread to go bad and were looking for a different and tasty way to cook it. Back then bread pudding used to be known as “poor man’s pudding”, but now it is known as a trendy must-have dessert at several restaurants. Bread pudding is a moist, custard-filled, tasty delight destined to satisfy anyone’s sweet tooth! My group and I chose this recipe for our chemistry project because we just couldn't resist picking it!
Our task for this project was to decide what we wanted to cook with a group of people, make a testable question that we could answer through cooking, and present our food and the results to our testable question. Our question was "What is the impact that the egg yolks have on the recipe? Do the egg whites affect the density?" Our results concluded that the Bread Pudding with the whole egg tasted better, was fluffier, rose more, and was denser. If a dessert such as bread or cake is dense that means it is more moist. The egg yolks in the recipe with the whole egg combined better with the bread and connected them as compared to just the egg whites. The bread pudding with the egg whites was drier and not as moist. It wasn't as moist for another reason, since there were not any egg yolks, there was not that much liquid in the bread pudding, and the bread bits that we had didn't properly get soaked in the mixture. Since everyone in our group agreed that we liked the bread pudding with the whole eggs instead we chose to make that recipe for our presentation which was a showcase of everyone's work in front of parents and community members. In this project I also learned that I'm not as bad as I thought I was at baking and I'd love to bake something again. I also learned that it's important to follow the recipe because for the first batch of bread pudding that we baked it was all uncooked from the bottom because we messed up and doubled parts of the recipe without doubling everything else. Our group also faced some other challenges like our whole footage being deleted and making it all up in our own time. But overall, I loved this project and I learned a lot about my own abilities and the chemistry behind cooking! 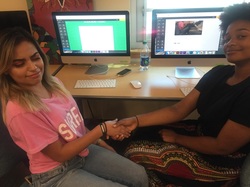 Although it can be nerve-wracking but when you have to meet new people like your teammates, you actually have to approach them. If you don't approach them, then you won't get to know them nor will you be friends with them (unless they approach you first). When you're first meeting someone you can be crazy nervous. Thoughts and different questions can all be racing through your head. Like do they like me? Do they totally hate me? And unfortunately sometimes it can be awkward, but if you follow Hibah's Guide for Introverts: Getting to Know your Teammates (coming to a bookstore near you!) you should be the new social butterfly and hopefully have made some new friends in your next painful school project! Step 1: The First Impression Your first impression is the only chance you get to wow your teammates. The first impression that they get from you is how they judge you which leads to them treating you a certain way from that time on. It’s the defining point of your whole relationship and you need it to be perfect and casual yet professional since they are team member. I recommend approaching them and shaking their hand. The handshake has to be firm and has to last long enough to give off a confident and totally chill vibe, if it gets too long you’ve blown your chance. That’s creepy and the chances of that person EVER liking you is now gone. Don’t be creepy but be confident, while shaking their hand look into their eyes. It gives off the vibe that you aren’t afraid of them and that you’re a natural born leader. Here’s an example of what not to do. They aren’t looking at each other and one of them looks disgusted (it was the last period of the day i'm sorry). 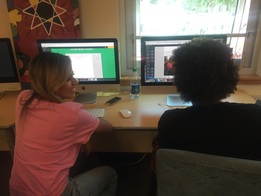 Step 2: Making Light Conversation If you have made it far enough to step 2 congratulations (most people don’t)!! Make light comfortable conversation. It’ll be awkward at first but eventually you’ll find something that’ll melt all the awkward tension away. Talk about tv shows, hobbies, favorite food, and favorite places that they have traveled to. Ask the questions in a non interrogative way otherwise that’s just weird and you’ve blown your shot. Be casual smile and often answer your questions before they do so they don’t feel uncomfortable. Also, be casual and don’t be clingy. No one likes a clingy and annoying person. The goal is to find a common interest and the conversation will just go from there. 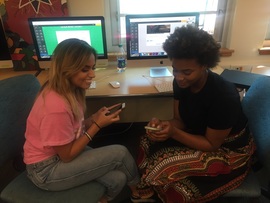 Step 3: Exchange each other’s contact information
As a group member and as a teenager it is absolutely VITAL that you get their phone number. I’ve had friends that I didn’t really get along with from the start but then we started texting and now we’re besties! Contact info is also really important in group projects because you need to collaborate over projects and talk to each other regarding due dates. I know that sometimes my group members forget to do their assignments and I send them a gentle reminder for them to get it done. |
AuthorHibah Shafi is a Senior at New Technology High School. Archives
May 2019
Categories |
 RSS Feed
